Inkjet printers are versatile tools capable of producing high-quality custom stickers for personal projects, small businesses, or creative endeavors. With the right materials, settings, and techniques, you can create professional-looking stickers that rival commercially printed alternatives. This comprehensive guide covers everything you need to know about printing stickers with inkjet printers.
Understanding Inkjet Sticker Printing Capabilities
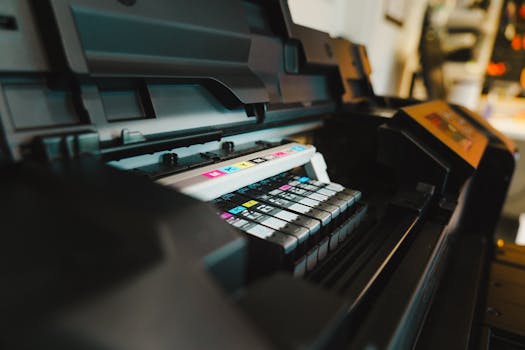
Modern inkjet printers excel at sticker printing due to their ability to produce vibrant colors, fine details, and smooth gradients. Unlike laser printers that use heat to fuse toner, inkjet printers spray liquid ink onto paper, making them ideal for specialty papers like sticker sheets. The key to success lies in understanding the printer's capabilities and working within its limitations.
Essential Materials for Inkjet Sticker Printing
Choosing the right materials is crucial for successful sticker printing. Start with inkjet-compatible sticker paper, which comes in various finishes including matte, glossy, transparent, and waterproof options. For outdoor use or items that will be handled frequently, consider vinyl sticker paper for enhanced durability. Always verify that your chosen paper is specifically designed for inkjet printers to prevent ink bleeding and adhesion issues.
Printer Configuration and Settings
Proper printer configuration ensures optimal print quality and prevents common issues like smudging or paper jams. Access your printer's settings through the control panel or computer software and select the appropriate paper type setting that matches your sticker paper. For most sticker projects, the "Premium Photo Paper" or "High Quality Paper" setting works well. Adjust the print quality to the highest setting for vibrant, detailed results.
Recommended Settings:
- Paper Type: Premium Photo Paper Glossy
- Print Quality: High/Best
- Color Mode: Color
- Borderless: Enabled (if needed)
- Media Size: Match your sticker sheet size
Design Preparation Tips
Before printing, prepare your designs using graphic design software. Create your artwork at 300 DPI (dots per inch) resolution for crisp, professional results. Add a bleed area of at least 1/8 inch around your design to account for minor cutting variations. Use vector graphics when possible for clean, scalable designs, and convert all text to outlines to prevent font substitution issues.
Printing Process and Best Practices
Load your sticker paper according to the manufacturer's orientation instructions, typically with the printable side facing down. Print a test page on regular paper first to check alignment and colors. When ready to print on sticker paper, handle sheets by the edges to avoid fingerprints on the adhesive side. Print one sheet at a time and allow adequate drying time between prints if doing multiple sheets.
Finishing and Protection Techniques
After printing, allow stickers to dry completely for at least 30 minutes to prevent smudging. For added protection against moisture, UV fading, and general wear, apply a clear sealant spray in thin, even coats. Laminate your stickers for maximum durability, especially for items that will be exposed to outdoor conditions or frequent handling. Always follow the sealant manufacturer's instructions for proper application and drying times.
Cutting and Application
Use precision scissors, craft knives, or cutting machines for clean edges. For kiss-cut stickers (where the backing paper remains intact), adjust your cutting depth carefully. When applying stickers, ensure the surface is clean, dry, and smooth. For permanent adhesion, apply firm pressure across the entire sticker surface, working from center to edges to remove air bubbles.
Common Issues and Solutions
Ink smudging typically indicates insufficient drying time or incorrect paper settings. Paper jams often result from loading sheets incorrectly or using paper that's too thick. Poor adhesion usually means using the wrong paper type for your surface. Faded colors suggest low ink levels or incorrect color profile settings. Address these issues by double-checking your materials, settings, and techniques.
📚 Read Next
Can I use any sticker paper with my inkjet printer?
No, you must use sticker paper specifically designed for inkjet printers. Inkjet-compatible papers have special coatings that absorb liquid ink properly, while other papers may cause bleeding, smudging, or poor adhesion.
How long should I wait for inkjet-printed stickers to dry?
Allow at least 30 minutes for basic drying, but for complete curing and maximum smudge resistance, wait 2-4 hours before handling. Drying time varies based on ink density, humidity, and paper type.
Are inkjet-printed stickers waterproof?
Standard inkjet-printed stickers are not waterproof unless you use waterproof sticker paper and apply a protective sealant. For outdoor use, choose waterproof materials and apply multiple thin coats of UV-resistant sealant.
What's the best way to cut out printed stickers?
For simple shapes, use sharp scissors or craft knives. For complex designs or multiple stickers, consider using a cutting machine like Cricut or Silhouette. Always cut on a protected surface to avoid damaging your work area.
Can I print on vinyl sticker paper with an inkjet printer?
Yes, but you must use vinyl sticker paper specifically formulated for inkjet printers. These specialty papers have coatings that allow ink absorption while maintaining the vinyl's adhesive properties and durability.