If you're starting out with electronics and want to make a project that reacts to light—like a night light that turns on automatically—you might come across a little blue board called the LM393 Light Sensor Module. Let's break down what it is and how you can use it.
What is this module, really?
Think of it as a tiny light meter. Its main job is to tell your microcontroller (like an Arduino) whether it's bright or dark. It's not giving you a precise number like "500 lux"; instead, it gives a simple "yes" or "no" signal, which is often all you need.
Handy Tools For You
The magic happens because of two main parts on that blue board:
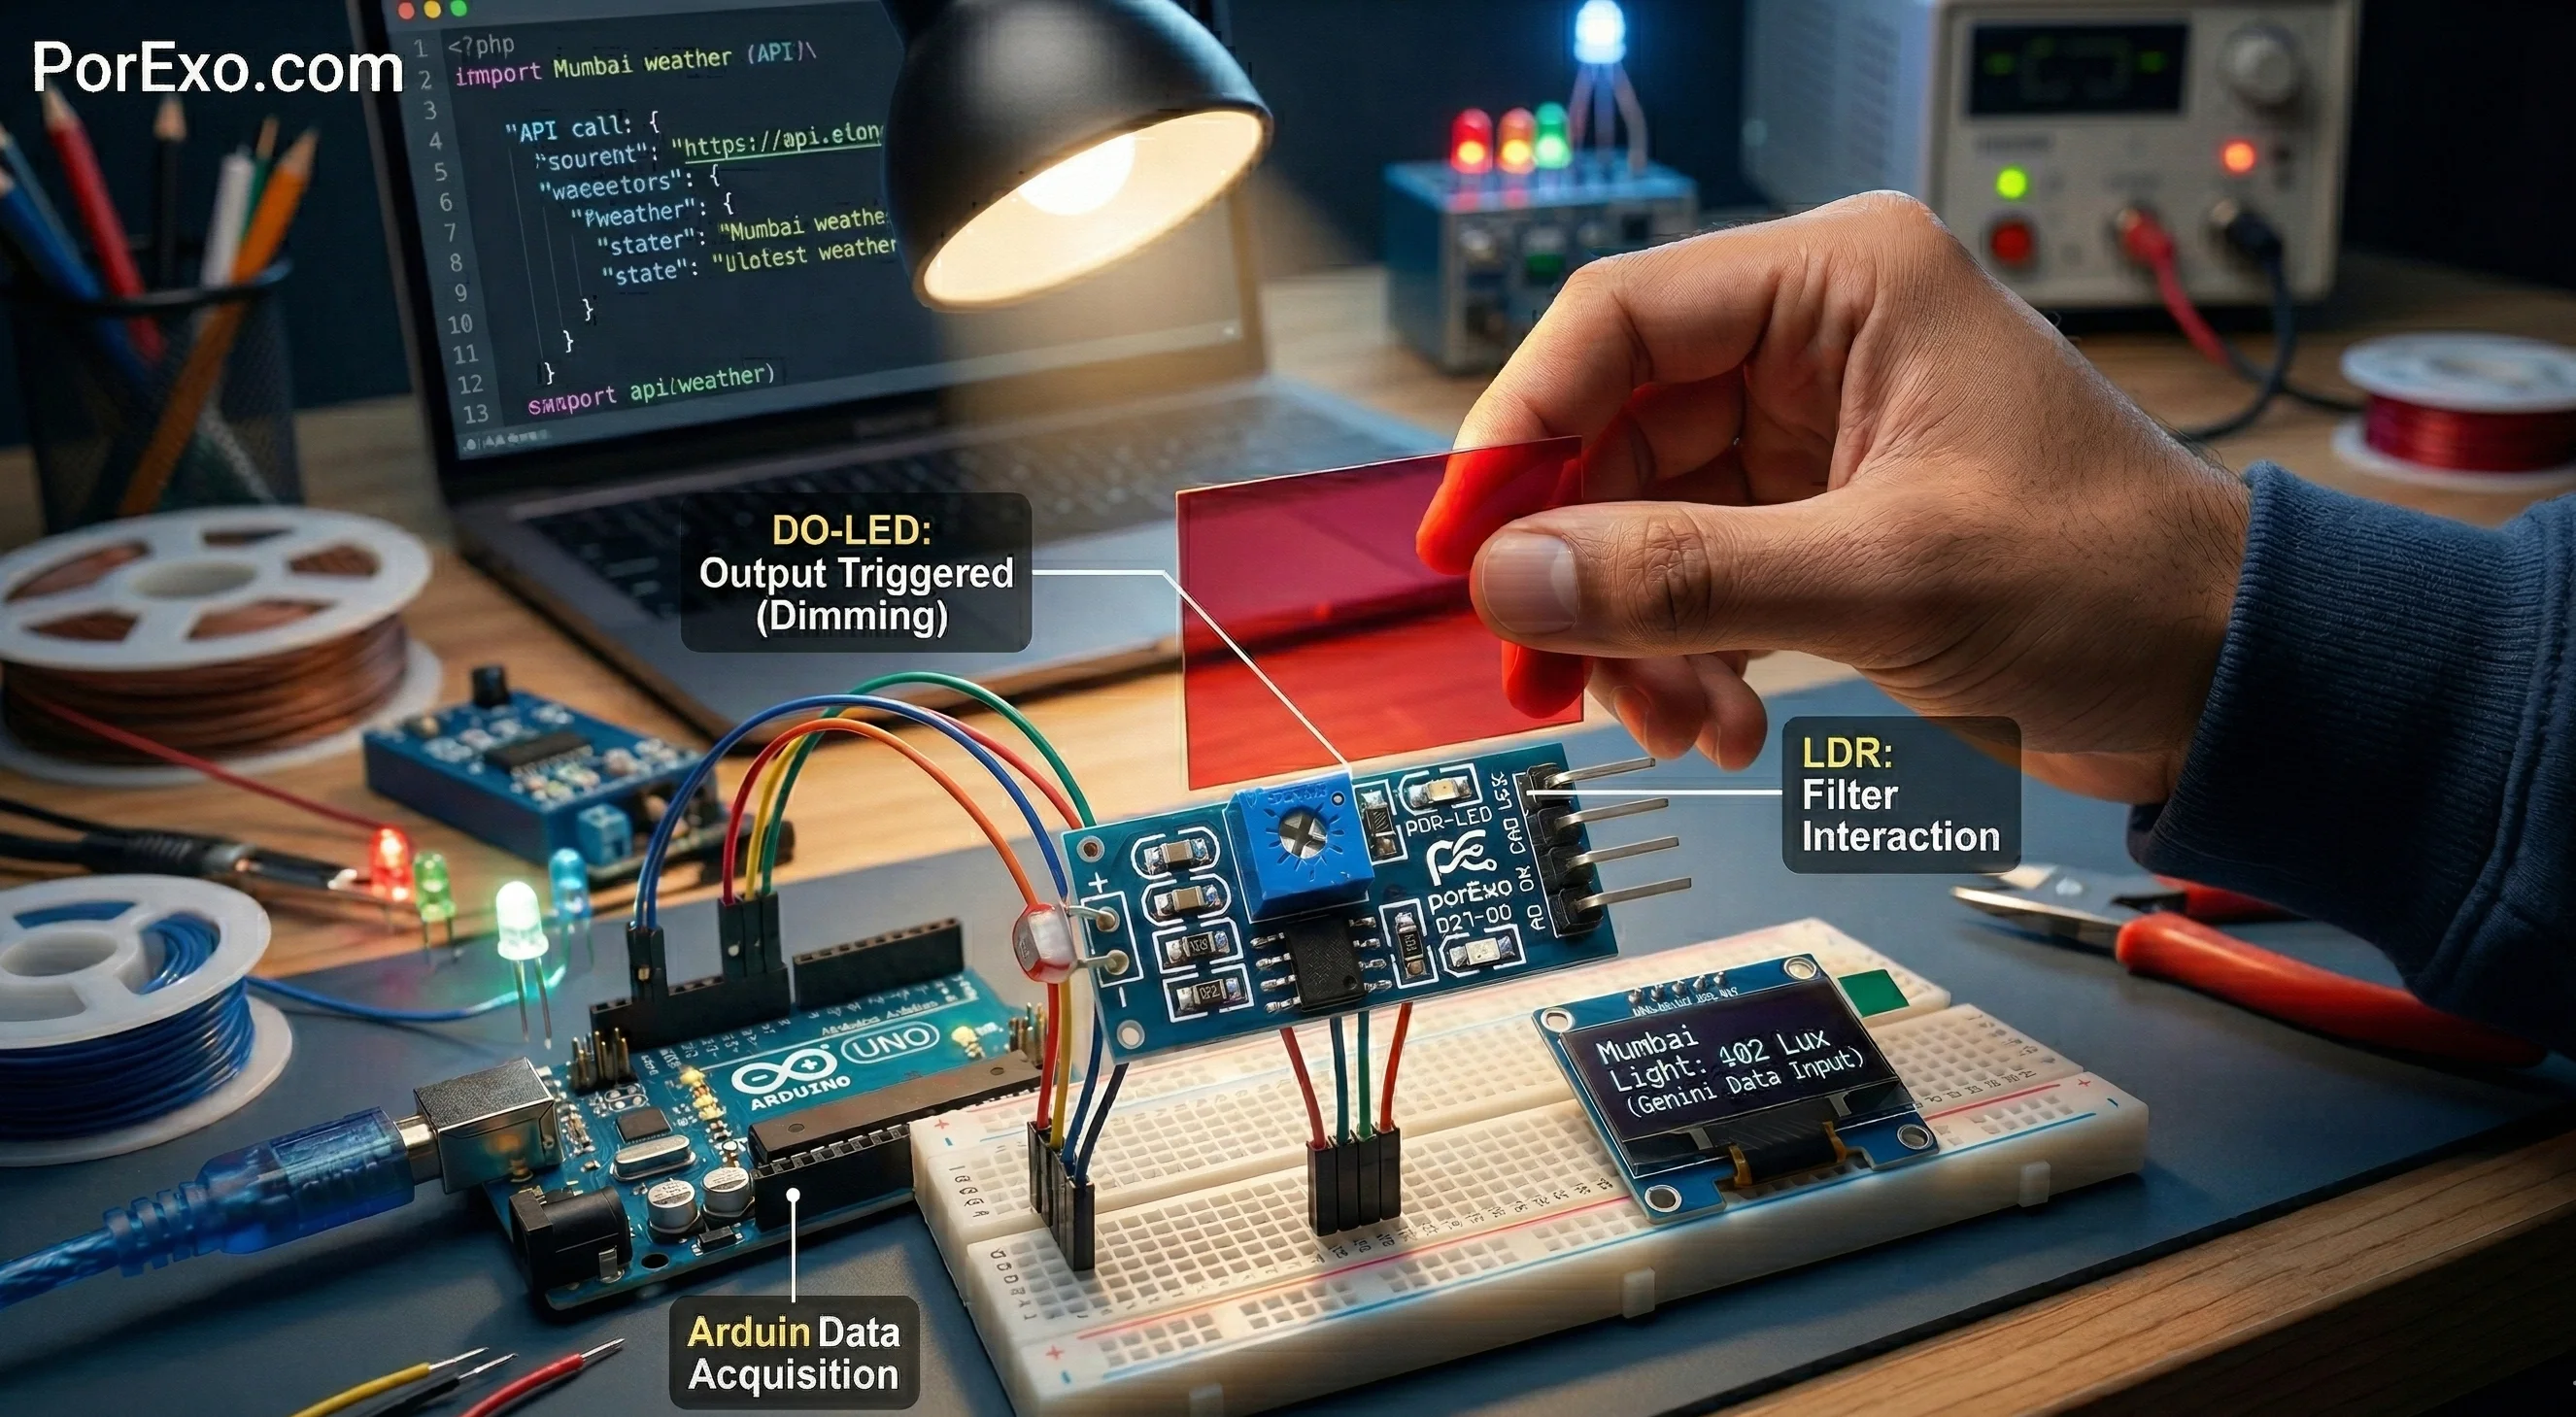
- The LDR (Light-Dependent Resistor): This is the round, squiggly-looking component. Its resistance changes with light. In the dark, it has high resistance. In bright light, its resistance drops.
- The LM393 Comparator Chip: This is the brains. It constantly compares the voltage from the LDR to a reference voltage you set with the potentiometer (the blue dial on the module). Based on this comparison, it flips its output from HIGH to LOW (or vice versa).
How to Connect It to an Arduino
Connecting it is straightforward. Here’s a typical wiring diagram for a basic light-detection project:
// Arduino Pins to LM393 Module
// Module VCC  -> Arduino 5V
// Module GND  -> Arduino GND
// Module OUT  -> Arduino Digital Pin 7
// (The AO pin is for analog output, which we won't use here)
And here's a simple sketch to read the digital signal and print the status to the Serial Monitor:
const int sensorPin = 7; // Digital pin connected to module OUT

void setup() {
  Serial.begin(9600);
  pinMode(sensorPin, INPUT);
}

void loop() {
  int sensorState = digitalRead(sensorPin);

  if (sensorState == LOW) {
    // LOW usually means light is detected (depends on module wiring)
    Serial.println("Light Detected!");
  } else {
    Serial.println("Dark!");
  }
  delay(500); // Wait half a second
}
What Can You Build With It?
This module is perfect for simple, on/off type projects. Here are a few ideas:
- Automatic Night Light: Turn on an LED strip when the room gets dark.
- Smart Garden Light: Have solar-powered lights turn on at dusk.
- Simple Security: Trigger a buzzer or send a notification if a light turns on in a room that should be dark.
- Art Installations: Make an interactive piece that changes based on ambient light.
For more complex projects where you need to measure exact light levels (like a photography light meter), you'd use the LDR directly with an analog pin. But for most beginner-friendly automation, this LM393 module is a great, reliable starting point. You can explore other simple sensor modules in our Multi Tools section for more project ideas.
Adjusting the Sensitivity
See that little blue potentiometer (the dial you can turn with a screwdriver)? That's your sensitivity control. Turn it clockwise or counter-clockwise to change the threshold at which the module switches its output. If your light is turning on too early in the evening, just tweak this knob.
Frequently Asked Questions
📚 Read Next


What's the difference between the DO and AO pins?
The DO (Digital Output) pin gives you a clean HIGH/LOW signal based on the comparator. The AO (Analog Output) pin gives you the raw voltage from the LDR, which you can read with an analog pin on your Arduino to get a range of values. For simple light/dark detection, just use the DO pin.
My sensor seems to act backwards. Light turns the output LOW, dark turns it HIGH. Is it broken?
Not at all! This is normal and depends on the specific wiring of your module. You can easily fix it in your code by swapping the logic (check for HIGH instead of LOW), or sometimes by turning the sensitivity potentiometer all the way in the other direction.
Can I use this outdoors?
You can, but be cautious. The module itself isn't waterproof. For outdoor use, you'll need to put it in a protective, sealed enclosure to shield it from rain and dust. The LDR's response is also designed for the visible light spectrum, so direct, harsh sunlight might saturate it. For professional environmental monitoring, you might look at dedicated photoresistor applications.
I need to measure precise light levels, not just dark/light. What should I use?
For precise measurements, you should bypass the LM393 comparator. Connect the LDR directly in a voltage divider circuit to an Arduino's analog input pin. This will let you read a value between 0 and 1023, which you can then map to a light intensity unit if you calibrate it. Our Unit Converter tool might be helpful if you're working with different measurement units in your project.